Note: I wasn't sure whether to continue this thread or start anew, so I continued.

First and foremost, you'll need a face image to work on. I would highly recommend starting with a forward-facing picture for first-timers since you won't have to worry about pesky perspective
issues. If you have a digital cam with a self-timer and a tripod (or a handy friend nearby) then snap a pic of yourself. Avoid lots of glare by staying 6 to 8 feet away, and look slightly above the lens and relax your eyes so you don't get a cross-eyed look. If possible, put a piece of
cardboard behind you, or a draped sheet or something in case you'd like to use the image later, then you won't have crazy cutting-out work to do later. Also, take the image at the HIGHEST resolution and quality settings your camera will allow. It will make your photo-editing work a billion times easier!
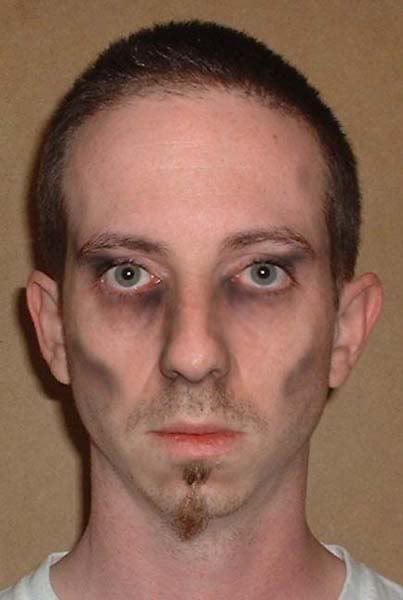
[before photo here]
I use Photoshop (sorry buffysmglover!) but honestly, just about everything I did can be done in Paint Shop Pro, Corel Painter or any other typical image editor. The only thing that is really quite necessary is support for multiple layers. I'll try to keep terms generic and explain how they work so you can figure out what tools might work for you. Also, keep in mind that a lot of the process was trial and error, so you can always try different tools to see if you find some easier way. I also can't stress enough the importance of SAVING OFTEN! If your computer or paint program should crash after you spent 30 minutes tweaking your artwork, you WILL turn evil like Angelus and destroy something. Please don't let that happen. Simply put, saving often is your Orb of Thessulah. Open your latest saved point and your soul is restored.

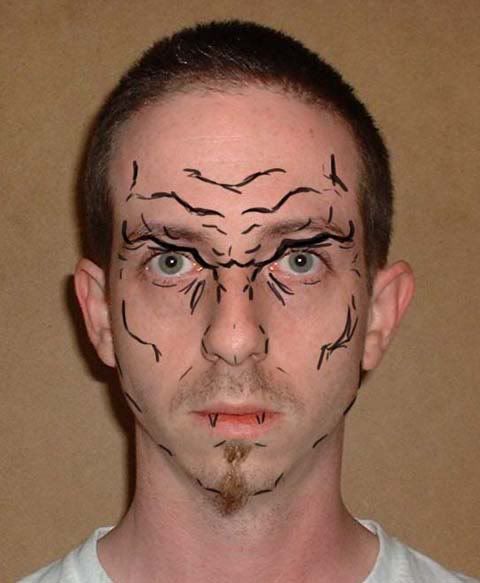
Open your image in your program, and then immediately copy the image to a second layer. Why? So that you have your original to refer to! Now make a new layer to start doodling your vamp features. This is where I sketched out rough lines to indicate where I'd have my foreheady-ness and also to indicate where I would put shading to emphasize my cheekbones, shade my chin, and so forth. This is just a loose guideline! Don't feel compelled to be Leonardo DaVinci here! You'll see on mine I was loose and rough. I even drew in cheesy pointy teeth, but ended up not doing teeth in my final image, because I thought they wouldn't look right with the closed mouth. You can use Angel, Spike, Penn, Darla, or other vamp photos for reference, but feel free to go your own route. I was going for a Joss vampire style, but didn't base it on any specific vampire. The key is a low over-hangy brow, and crinkled nose bridge. Beyond that, it's your design, go nuts. My only warning is to avoid an over-abundance of horizontal wrinkles and try not to go more than halfway up the forehead, or else you run the risk of looking more like a Klingon than a vampire.
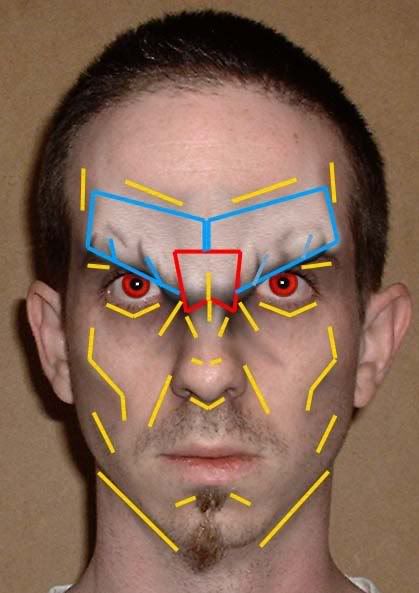
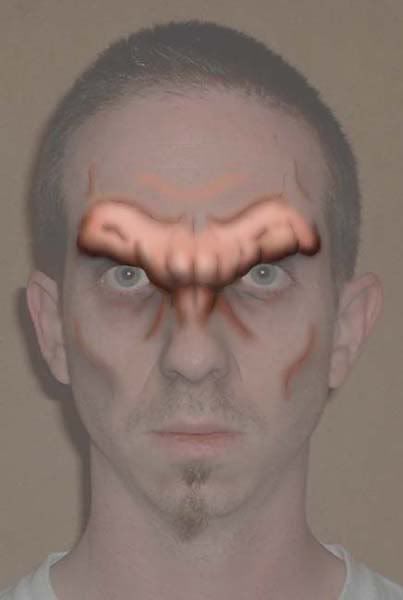
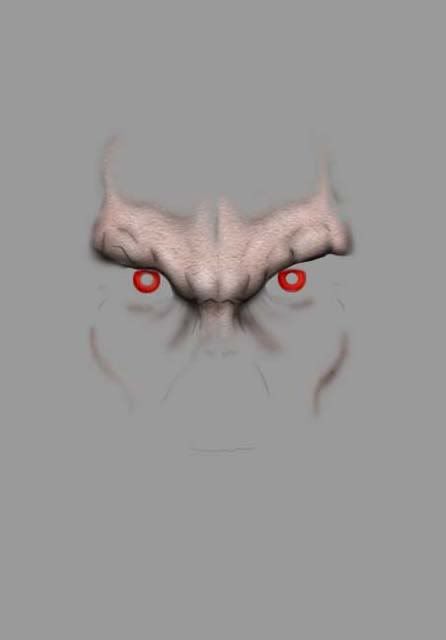
I've included a really rough guideline to give my version of a Joss Whedon Vampire Guide. The blue areas indicate the bulk of the broody-hangy brow. The red is where you get the bulgey-wrinkle of the nose where that brow crinkles into it and helps REALLY emphasize primal growly-facedness when someone is mad. Alll the yellow lines indicate where shading helps to bring out a real angular depth to illustrate undeadness. Noe that not ALL of the Buffy/Angel vamps have this! On some the shading is very subtle and that overdoing it can lead to a really creepy nasty look, but that might be your goal. Also, degree of paleness is a matter of taste and style.
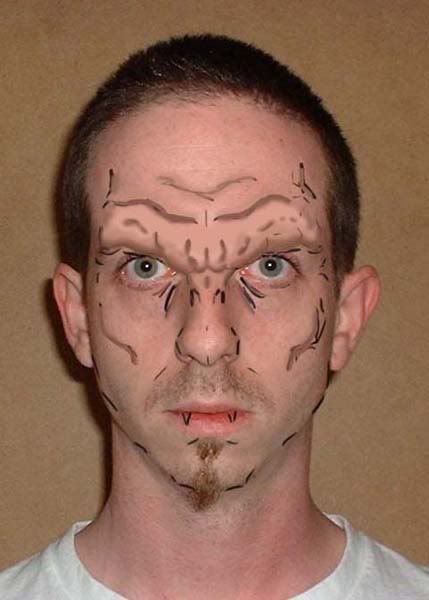
Now you will begin to do the painterly work. Create a new layer, keeping your sketch layer visible under it. Grab a paintbrush tool and using an eyedropper tool, select skintone color from your forehead somewhere near the middle and a little above the bridge of your nose. It doesn't have to be exact, it's just a good reference point. Now begin painting loosely within the boundaries of the sketchy area. Now use the eyedropper and select an area slightly darker and paint around the lower edges to do some rough shading. This is where a little bit of shading and artsy know-how comes in handy, but you can fake it a bit, just look at your own face and see where the shadows are and replicate that but don't worry about being perfect at this stage. If you want to grab a lighter color or darker color and do more shading work, go for it.
Now comes a new type of step. Go to your face layer and you'll be using the Dodge and Burn tools. The Dodge tool makes things lighter and the Burn tool darkens. You'll use the Burn tool here to shade around your eyes, cheekbones, chin, and generally anywhere that you want to emphasize shadow and a hollow or gaunt look. In Photoshop the Burn and Dodge tools have a Midtones, Highlights and Shadows option. Midtones generally darkens smoothly. Selecting Highlights will
introduce a lot of gray and Shadows will bring out a lot of color. Lowering the exposure option will lessen the effect and make it easier to fine tune. In Paint Shop Pro you might need to set your airbrush tool to a Burn blend mode and set your color to black, then set your opacity very low until you find the amount that works for you. You'll see below that was I did was generally darken the areas around my eyes, nose, cheeks and chin. You'll notice on my eyes that only a portion is darkened. That's because the rest of my uppereyelids will be covered by my vampy forehead anyway, so no need to paint/darken what won't be seen. It'll help to have your painted forehead area visible so you know where you need to darken.
Now switch back to your vamp forehead layer. In photoshop switch to your Blur tool. It looks like a water droplet. Set your brush hardness very low to give yourself a soft brush, and set the blur strength to around 50%. Brush size will depend on your image but about the size of your pupil (in the image) should suffice. Now take your time and blur the areas you shaded on your forehead so that the shaded areas blend smoothly into the other areas but try to keep the lower edge (above your eye) crisp. This might take some practice and patience.
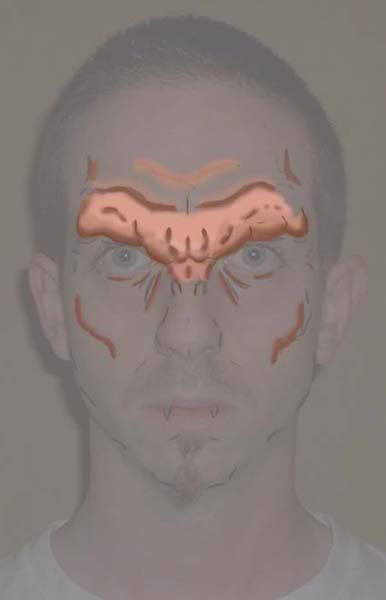
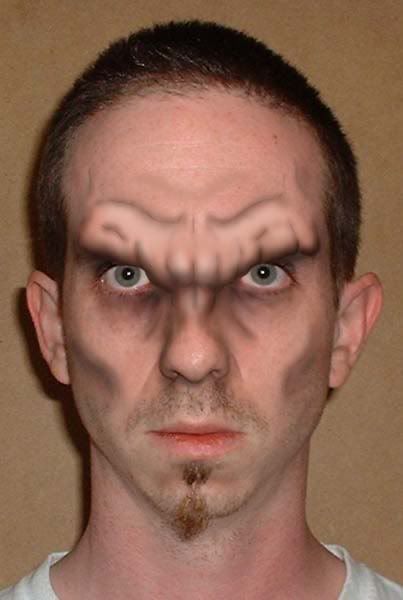
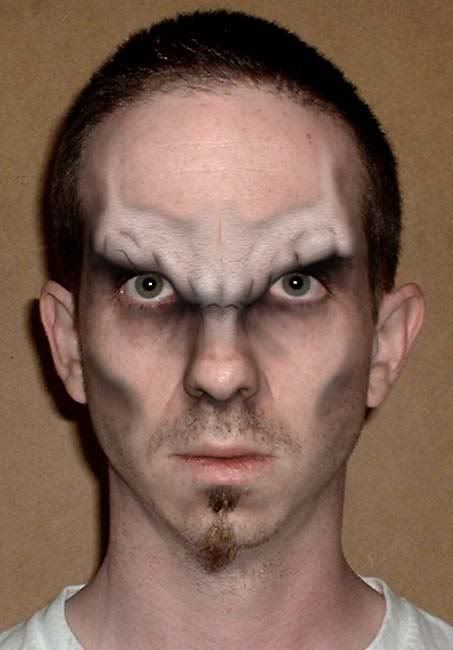
Now reselect your Burn tool and use that to emphasize your shading and intensify it, and alternate with your Dodge tool for highlights. Use your face image for lighting reference in an effort to match the amount of highlight and shaded area. You'll see my shading is a little heavy and that I later went back and lightened it in spots. The two images below are the same except in one the face is greyed out to show the forehead work more clearly.
My next step was to give some texture to the forehead parts. In Photoshop I did this with the Layer Styles tool and it took a LOT of finessing. I really can't even begin to explain how to use the Layer Styles. I subsequently tried the Texturizer tool and found that a sandstone texture, set to about 50 to 75% size with Top lighting worked FINE, and I did the Dance of Shame for wasting so much time messing the the Layer Styles tool. In any other paint program, if you have a texture tool, use that, picking a sandy texture, go light on it. It's just to make the painted forehead less smooth and plastic looking, so don't fret about getting it exact, especially if you'll be doing a watercolor or painterly effect on the final image! At this point I also decided to make myself even more pasty white than I normally appear. This can be done any number of ways, but what I did was go into my hue and saturation editor and choose the RED channel and lower the saturation until I appeared fairly pale but NOT black & white. You can do the same to your forehead layer as well until it matches adequately.
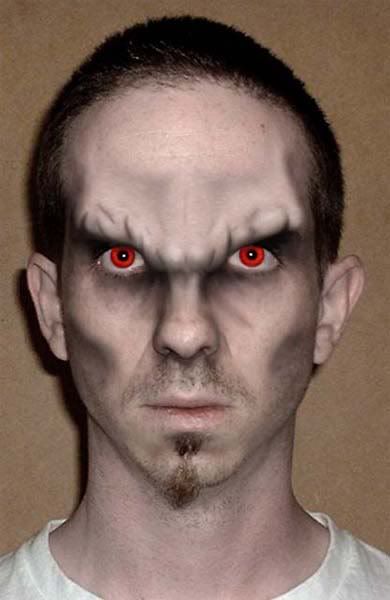
Ahh, the eyes! The eyes are fairly simple. Use your selection tool to make a circular selection around your irises. Most let you hold Shift to make additional selections. Select one eye, then do that to select the other. Don't worry about overlapping the eyelashes just yet. Now hold down whatever key lets you subtract from a selection (Alt in Photoshop) and use the circular tool again to "cut out" the pupils. It might take a little trial and error to line it up right, but you'll get it. If you have a lasso tool, switch to it now before deselecting anything and cutout whatever parts of your selection overlap your eyelids, eyelashes, etc. Now you should have only the colored portion of your eyes selected. Create a new layer and then fill the selected area with red, or yellow, or whatever color you like for vamp eyes. Then adjust your blend mode to achieve the desired level of affect you like. You can use a paint tool to fine tune the effect if you like. I kept it simple and barely touched it except for a little darker red around the inner and outer edges and a smidge of orange in the center. Below is how the eyes look. Even though they are on their own seperate layer, I show the forehead with them for reference.
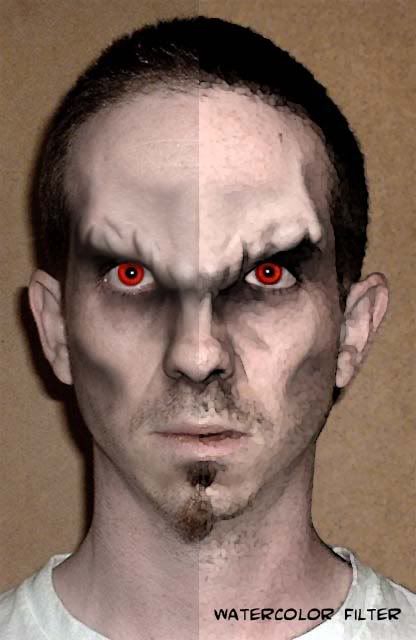
You're just about done. A little Blur Tool work to smooth the edges and some fine airbrush detailing to smooth the shadows out or the deepen some. It doesn't have to be flawless, especially if you'll be giving it a filter treatment at the end. I chose to give it a Watercolor filter treatmeant because A) it hid my shading defects, and B) I thought it gave it a kick-ass
comic cover look. Judge for yourself. I honestly do not think my un-filtered image is nearly as good looking as my filtered version. The side-by-side really shows what I mean.
Well, there you go. I'm sure my tutorial was very rough, and please ask all the questions you need to. Above all, just go nuts and try new things. I constantly try new tools and new ways to achieve different effects.
Next I'll try to vamp myself in an angled portrait with my mouth open to do a snarling sidelong glance. If anyone wants to submit images to me to vamp them I'll be happy to try it. If I get a ton of them I'll choose the best snarl to vamp! lol
I wish you the best of luck using my tutorial! Have fun
-numfar
P.S. Here is a link to my Photobucket album with all of these images in case you want to refer to them without have to scroll through all of my ranting and raving. If the link doesn't work, flay me.
s135.photobucket.com/albums/q131/FF-art/Vampire/